
Blown-in cellulose insulation is a practical and energy-efficient choice for homeowners in Sturbridge looking to enhance their property’s thermal performance. This insulation method provides an effective barrier against heat loss and air infiltration, making homes more comfortable year-round. Understanding the installation process helps homeowners make informed decisions about their insulation needs.
Blown-in cellulose insulation consists of recycled paper treated with fire-resistant chemicals. It is a cost-effective and environmentally friendly alternative to fiberglass insulation. The material is applied using a specialized blower machine, allowing it to fill gaps and voids effectively. This ensures consistent coverage and enhances the home’s energy efficiency.
Before starting the installation, a few preparatory steps are necessary:
A professional will assess the home’s insulation needs, checking existing insulation levels, air leaks, and structural conditions. This ensures that blown-in cellulose is the right fit for the space.
Air leaks can undermine insulation performance. Sealing gaps around doors, windows, and other openings before installation helps maximize energy efficiency.
The recommended insulation depth depends on climate conditions and energy goals. In Massachusetts, an R-value of R-49 to R-60 is recommended for attics, which translates to approximately 12–16 inches of blown-in cellulose.
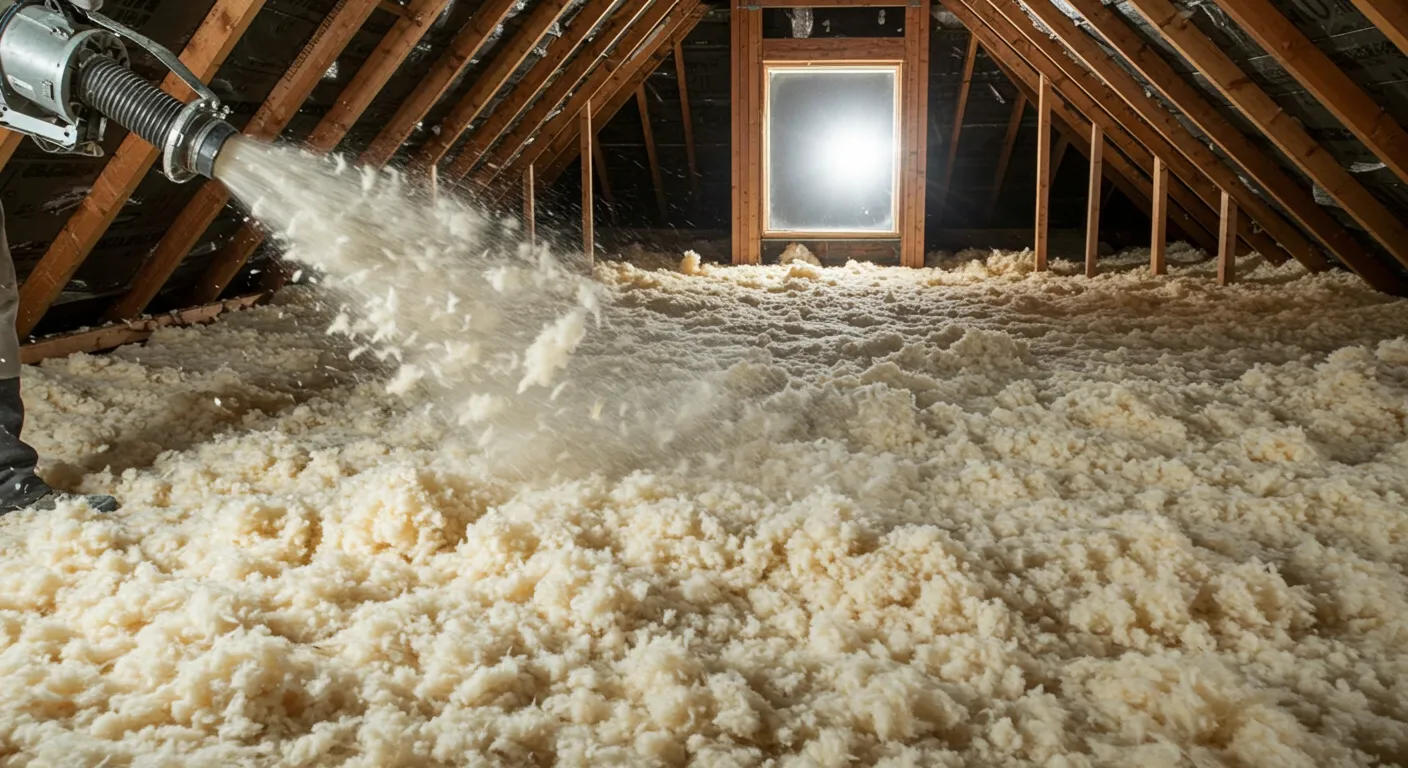
A heavy-duty insulation blower is positioned outside the home. The cellulose material is loaded into the machine, which processes and feeds it through a long hose.
For attics, installation typically takes place through an attic hatch. For wall cavities, small access holes are drilled between studs to allow for proper material distribution.
The cellulose is evenly distributed into attics or walls. Technicians ensure that the material fills all voids without excessive settling.
After application, the insulation is checked for uniform coverage. Settling allowances are factored in to maintain long-term efficiency.
If wall cavities were drilled, the access holes are sealed and patched. The work area is cleaned to remove any stray insulation particles.
Homeowners should monitor indoor temperatures and energy bills over the following months to assess improvements. Infrared thermography can be used to check for gaps or inconsistencies.
Blown-in cellulose insulation remains effective for decades but should be inspected periodically for settling or moisture exposure. If any degradation occurs, top-ups or adjustments may be necessary.
Hiring an experienced contractor ensures the best results. Professional installers have the tools and expertise to apply the insulation efficiently, ensuring optimal performance.
Looking to improve your home’s insulation? Contact Lamothe Insulation & Contracting at (508) 847-0119 or email [email protected] for expert installation services.
Blown-in cellulose insulation can last 20–30 years or longer when installed correctly and kept dry.
Yes, it can be added on top of existing insulation to improve thermal performance.
Yes, it is treated with non-toxic fire retardants and does not contain harmful chemicals.
The cost varies based on the size of the space and insulation depth. On average, it ranges from $1.00 to $1.50 per square foot.
Some settling occurs, but professionals account for this during installation by applying extra material.
While possible, professional installation ensures proper density, coverage, and efficiency.
Yes, it is treated with borate compounds that help resist mold and pests.
Most installations are completed within a day, depending on the size of the space.
Cellulose insulation typically provides an R-value of R-3.2 to R-3.8 per inch.
Yes, it can be extracted if necessary, but this is a labor-intensive process best handled by professionals.